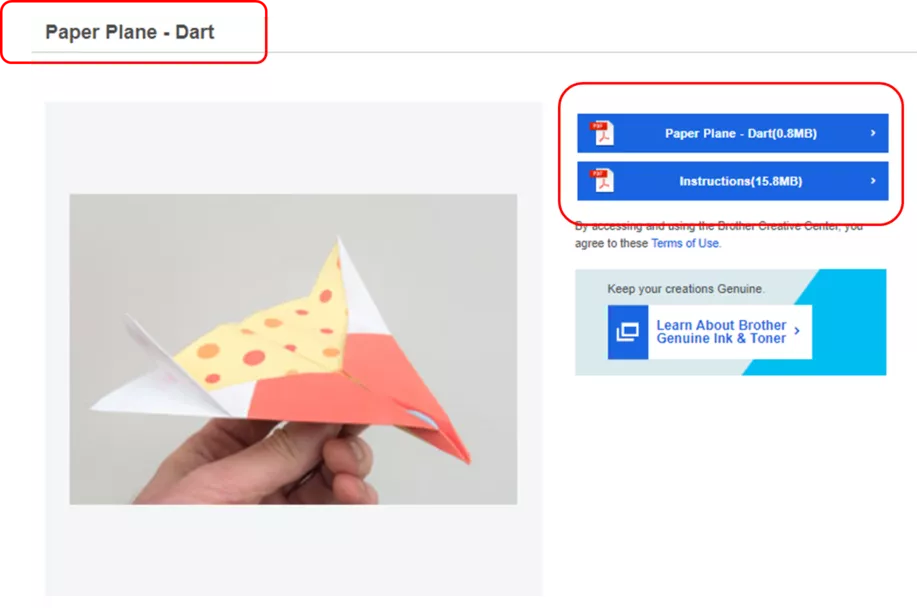
How to Make Paper Planes with Brother Creative Center

Paper planes are timeless symbols of creativity and playfulness. Whatever generation you are from, bet you have done it too especially during childhood. 😊 Creating paper planes is simple, fun, and easy; playing with it is even more. 😊 With just a piece of paper, you can effortlessly craft this toy figure in no time.
If you want to take your plane-making skills to a whole new level or perhaps have not tried it so far, Brother Creative Center, an innovative online platform for crafting and design can walk you through the process on how to make paper planes that are unique and eye-catching.
Materials You’ll Need:
- A computer, phone or tablet with internet access. This will help you access the Brother Creative Center, and explore various designs, learn how to make paper planes and print complete guides on how to make them.
- Printer. Say goodbye to plain paper planes and hi to unique, colourful and attention-grabbing planes! You can use a regular home printer that can give a quality print with brilliant colour graphics and photos. The Brother DCP-T220 Ink tank printer is one of the best machines that matches this need.
- Standard A4 sized paper. This paper size is recommended; however, other papers can also be as equally as good as the standard. Just be mindful that the pattern won’t be affected before printing.
How to Make Paper Planes
Step 1: Access Brother Creative Center from your device
Open your preferred web browser and visit the Brother Creative Center. Here you can discover different paper plane templates and other patterns too, so feel free to try whatever catches your eye! 😊
Step 2: Choose your template
Navigate the page and choose “Paper Craft & Origami Templates” or you can simply type “paper plane” in the search bar to find relevant designs.
Step 3: Print the chosen template
Once you selected the design, download the file with the printable pattern and the one with the complete instructions on how to make paper plane. Print the paper plane template and read the instructions for execution. Ensure your printer is properly connected and loaded with the appropriate paper size.
Step 4: Fold your paper plane
Carefully cut out the printed paper plane template along its edges and make sure to follow the folding and cutting lines as per the instructions. Take your time with each fold to ensure your plane comes out neat and well-constructed.
Step 5: Test and Adjust
Once the paper plane is fully folded, give it a gentle toss to test its flight. 😊 If the plane does not fly as expected, make minor adjustments to the folds until you achieve the desired flight pattern.
Step 6: Experiment and Have Fun!
Don’t be afraid to experiment with different paper types, colors and designs. Brother Creative Center offers a variety of templates, so feel free to create a fleet of unique paper planes or any other projects that interest you.
Brother Creative Center provides a fantastic platform for creating personalized paper planes that reflect your unique style and creativity. By following this step-by-step guide, you can print and fold paper planes that not only look great but also soar through the air with elegance. So, unleash your imagination, dive into the templates, and let your paper planes take flight like never before!
Brother International Gulf FZE offers a wide range of multifunction printers, scanners, sewing machines, and label printers. As the central hub, it manages a vast network of authorized distributors across the Middle East, Levant, and substantial parts of Africa, including North Africa, ensuring accessibility and distribution.


.webp?h=1000&iar=0&w=2340&rev=59b40aa34f914595945d88e80834bda0)